 sprout
 Summary
How you can get a @yourdomain.com email up and running!
See A short list of things i don’t want to self host for an explanation on why I don’t self-host a mail server.
I use Mailgun. (I used to use Sendgrid, but as of 2025/07 they’re getting rid of their free tier  )
)
You can fetch your SMTP credentials from the webapp.
Forwarding incoming email
If you already use a mail client like Gmail for your existing email address, it’s usually easiest just to forward all of your incoming mail from @yourdomain.com to your main email. Most domain registrars (Porkbun, Namecheap, etc) will do this for free.
- Enable ‘wildcard’ if you want people to be able to type anything into the left side of the @ (so things like
randomstring123123123@yourdomain.comwill still work).
Sending email
Domain Verification
Go to https://app.mailgun.com/mg/sending. Then in the sidebar, click “Domains” → “Add new domain”.
- Mailgun recommends that you use a subdomain, but if you want to send as your root domain disregard their advice. It’s mostly geared towards corporations who need to manage multiple mailing lists, make sure their marketing emails don’t get flagged as spam, etc.
Once you’ve created a domain, you’ll need to verify it by pasting in some TXT DNS records into your DNS provider (like Cloudflare etc).
- Skip the “Receiving records” step if you are already forwarding your email. If you prefer having more granular control over received mail you can use Mailgun as your forwarding service too, but you probably don’t need to.
Getting credentials
Go to Send → Domain Settings → SMTP credentials) and click “Add new SMTP user”. The credentials are now:
- Username:
youruser@yourdomain.com - Password: gets copied to clipboard upon user creation
- Domain:
smtp.mailgun.org - Port: 587
Adding to gmail
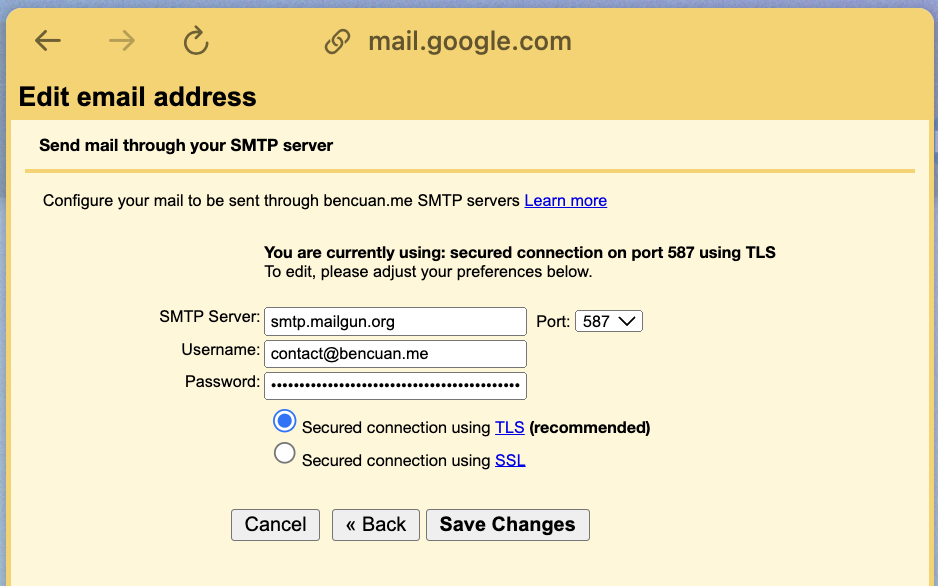
Go to the gmail settings → Accounts and Import.
Create a new address under the “Send mail as” section, and check the box that says “use as alias”. Then, enter the SMTP server, username, password, and port from above:
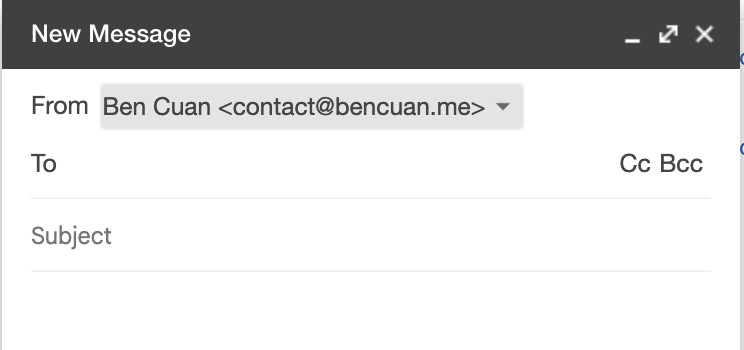
Now, when you compose a new message there should be a dropdown arrow next to the “from” field! You should be able to select your email from the list and send a test message.